
Import transactions
Import is how bank rows become Beancount transactions. BeanHub uses the open-source beanhub-import engine. You describe inputs and rules in .beanhub/imports.yaml. The engine extracts rows with beanhub-extract, matches them, and writes or updates transactions in your .bean files.
You do not need to memorize the YAML on day one. The sample book already has rules. Follow the steps below with the sample CSV.
1. Confirm you have rules
Section titled “1. Confirm you have rules”Open .beanhub/imports.yaml from Home. The sample file maps import-data/mercury/*.csv to Assets:Bank:US:Mercury:Checking and matches payees such as Netflix-style SaaS names. Full syntax: beanhub-import docs. A long tutorial: Academy step-by-step.
Input Files (under Import) lists paths that currently match those rules.
2. Upload a CSV
Section titled “2. Upload a CSV”- Sidebar Import → Upload Files.
- Click Upload file.
- Choose a CSV (
accept="text/csv"in the form). - Upload.
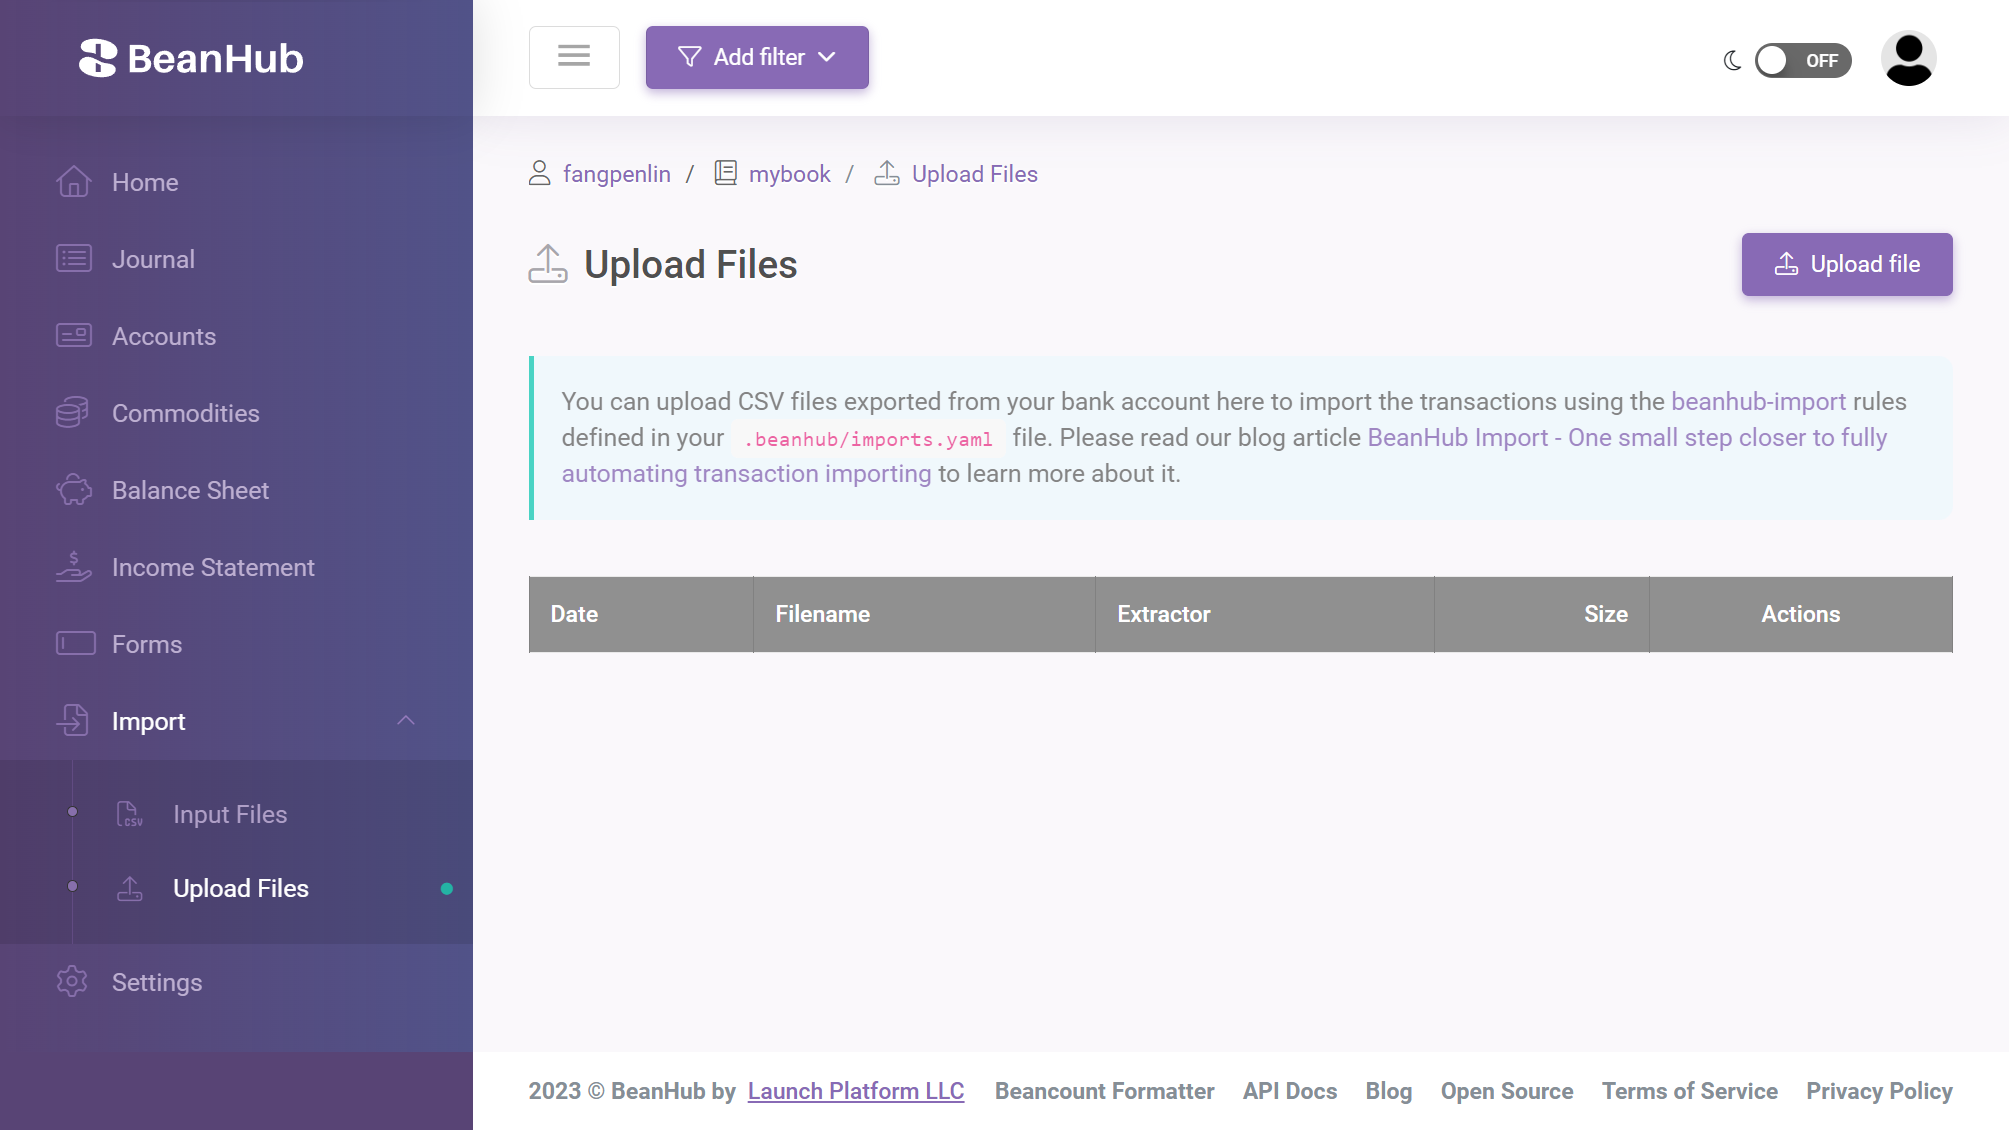
The sample CSV used by the cookiecutter README is beanhub-import-sample.csv. Download it, then upload.
3. Review and import
Section titled “3. Review and import”BeanHub opens a review page for the uploaded file. Check the path it will write to (it should match an inputs.match glob, for example import-data/mercury/2024.csv). Click Import.
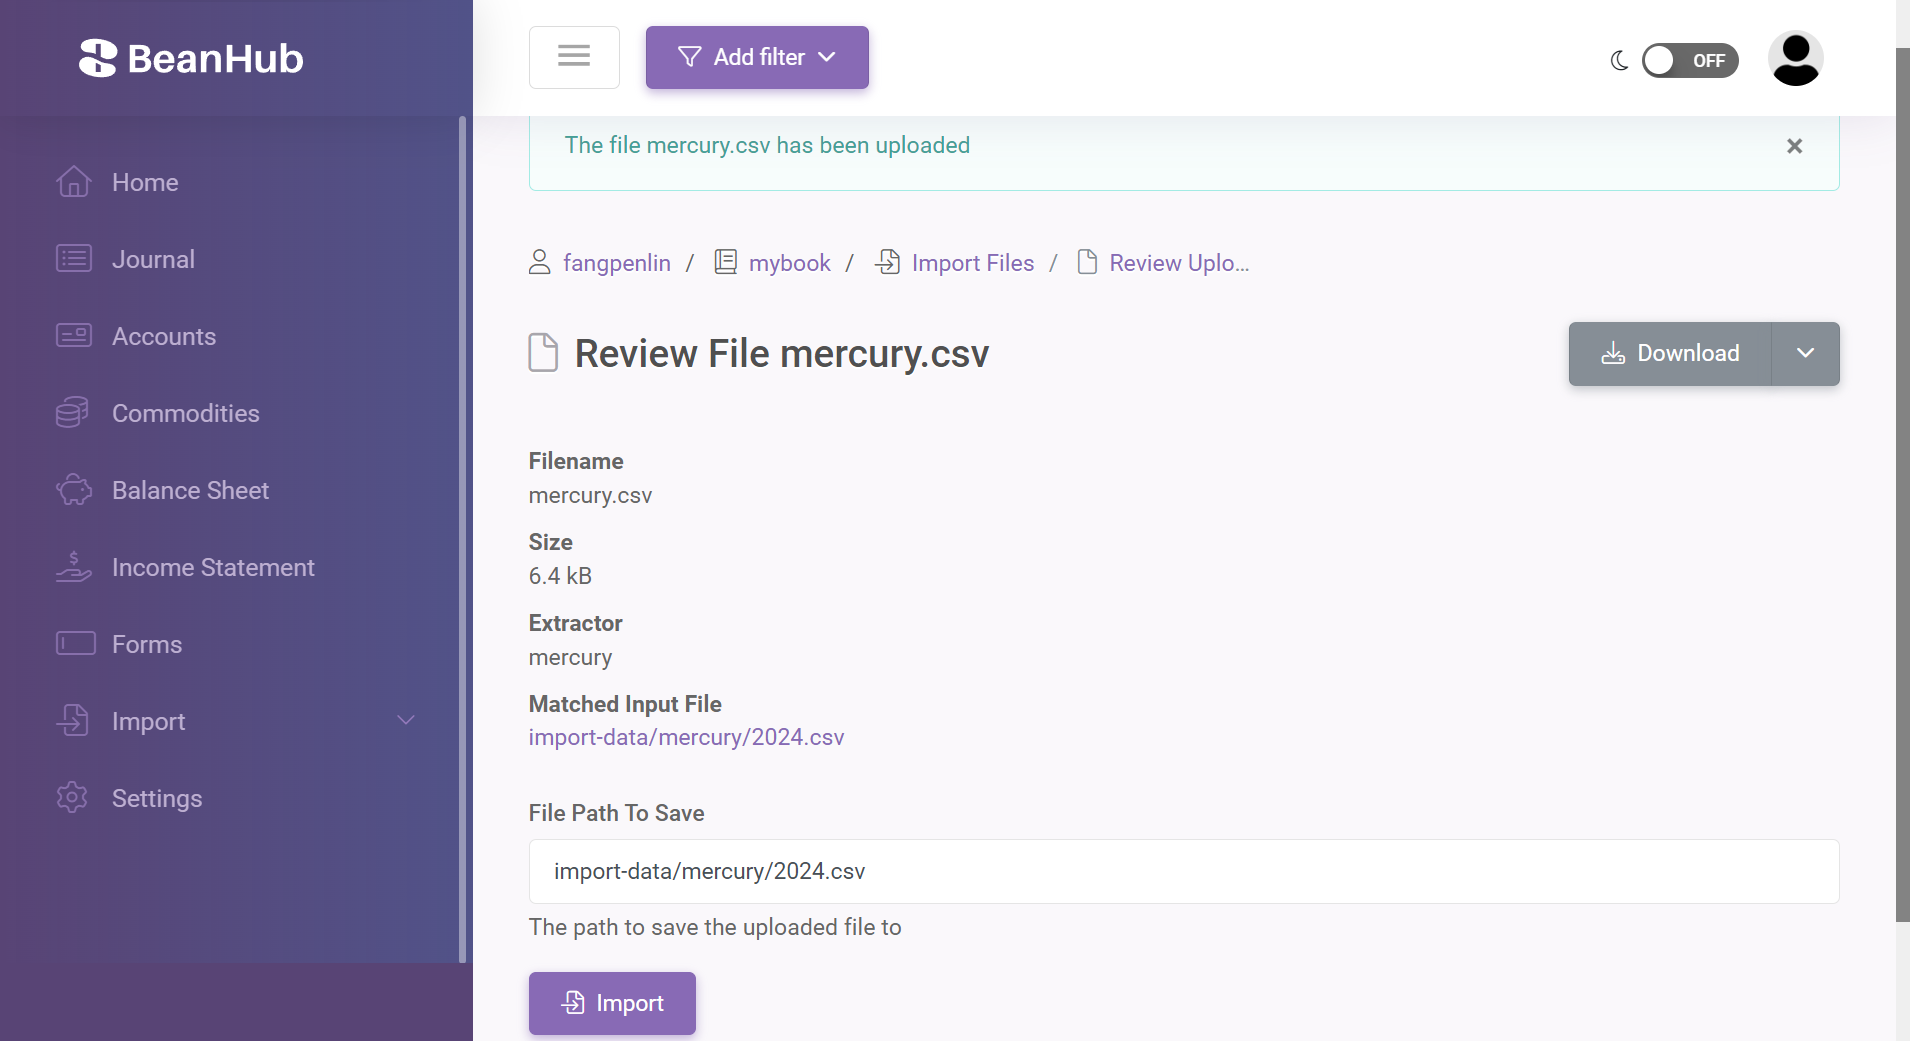
Import copies the CSV into the Git tree (if needed), runs the rules, and commits. Matched rows become Beancount transactions. Unmatched rows become Open transactions (the Open TXNs page): bank rows that still need a human to pick the other account.
4. Open transactions (manual import)
Section titled “4. Open transactions (manual import)”Import → Open TXNs lists rows that did not match any rule. This is expected for one-off purchases.
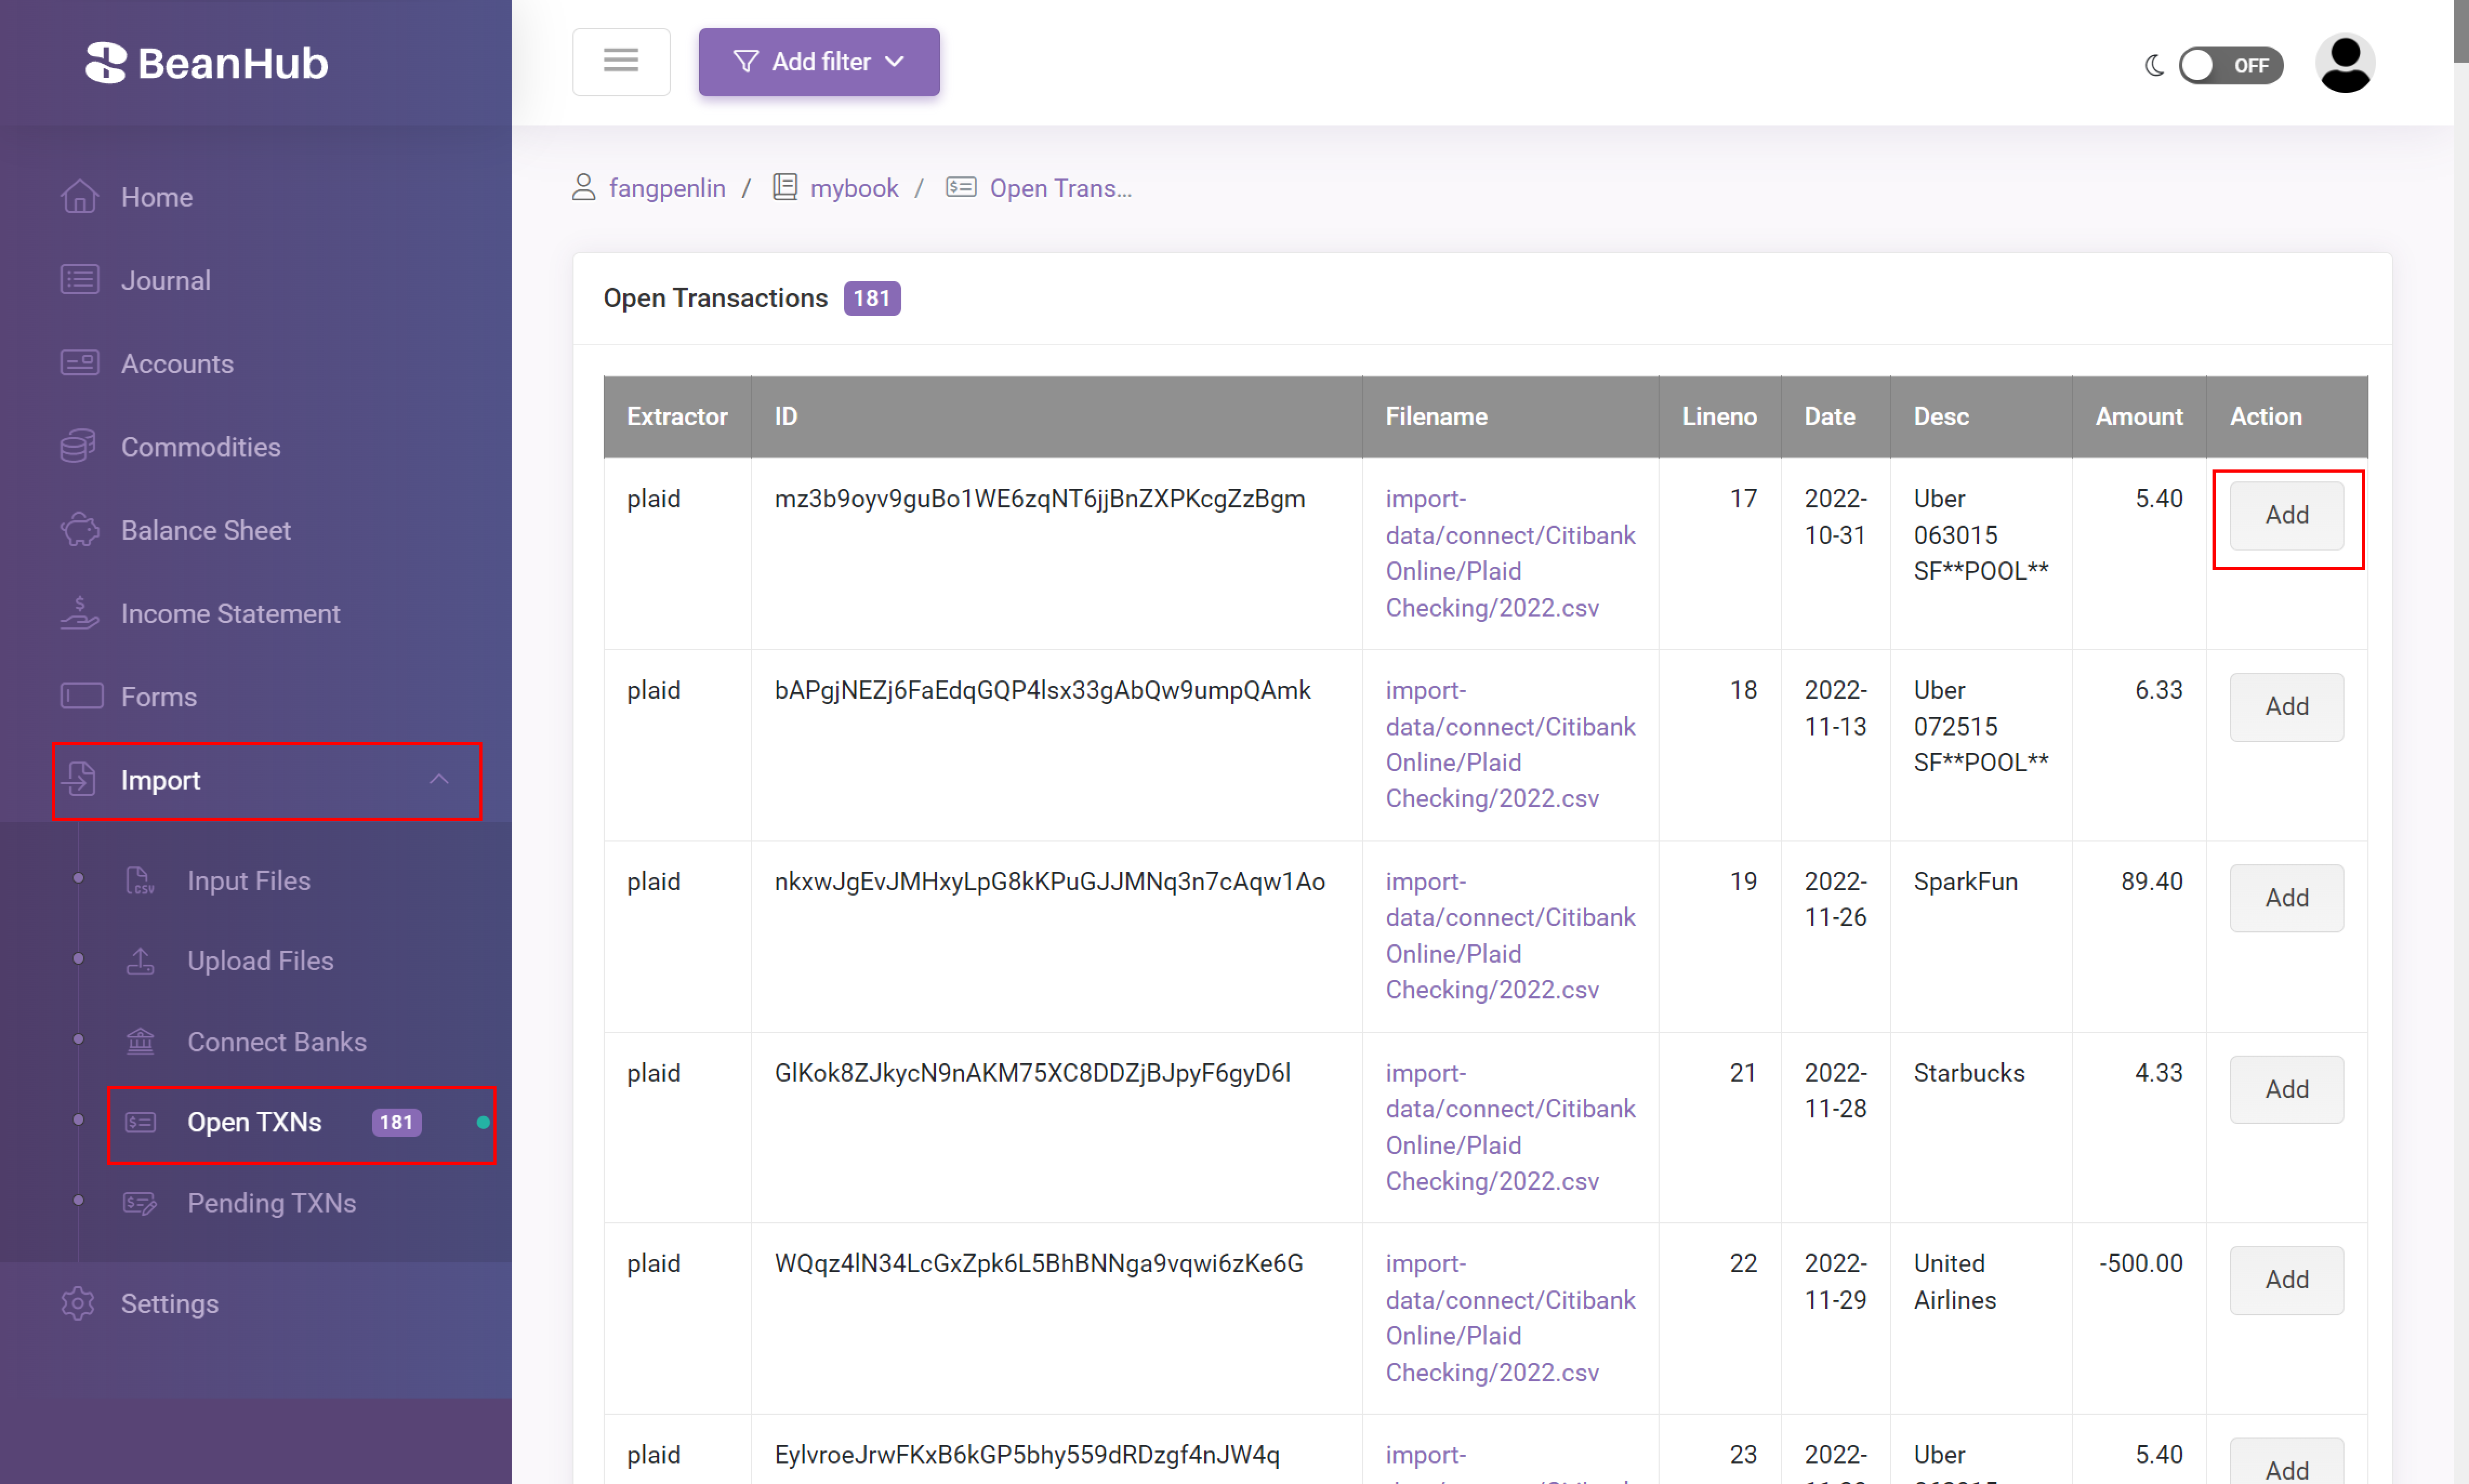
- Click Add on a row.
- The form is mostly filled (date, amount, the bank account posting). Fill the other account (autocomplete) and narration if needed.
- Submit. The row moves to Pending TXNs.
When you have reviewed the pending list, commit them. BeanHub writes transactions with import-override: "none" so later automatic rules do not overwrite your manual choices. You can change that metadata later. Details: Manual Import blog post.
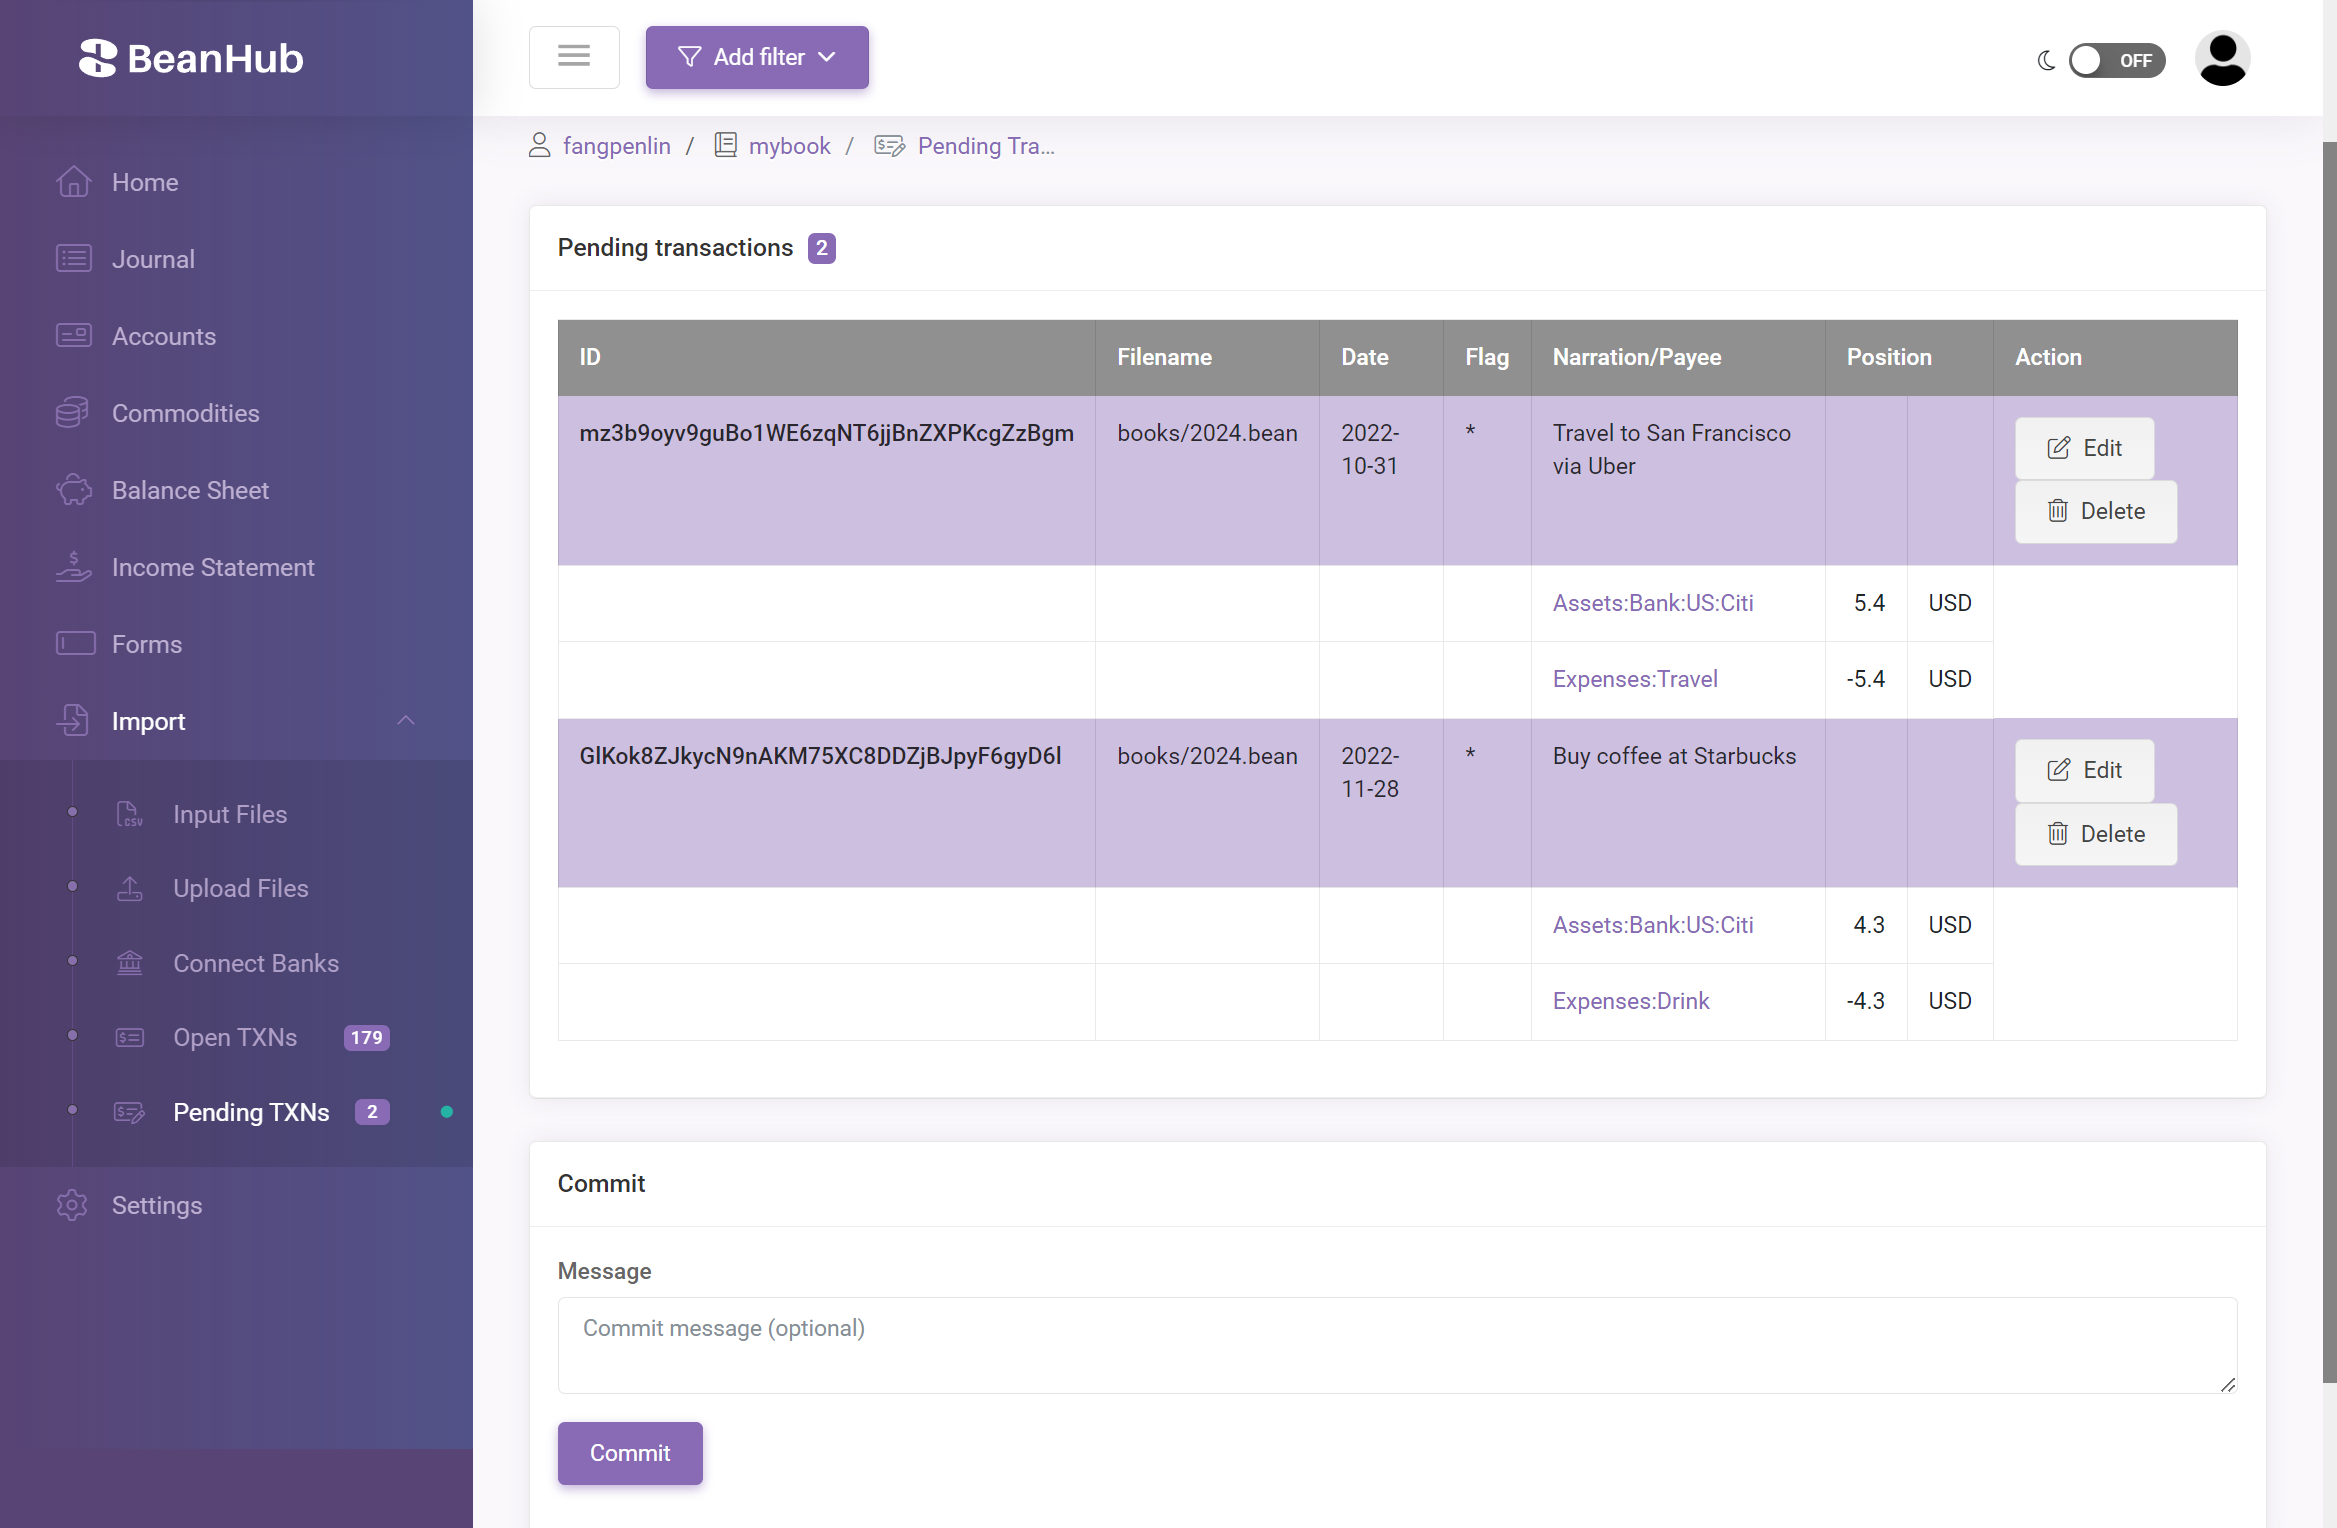
Deleting a pending transaction sends it back to Open TXNs.
5. Write a tiny rule (optional)
Section titled “5. Write a tiny rule (optional)”Rules are YAML. A minimal match on description prefix:
inputs:  - match: "import-data/mercury/*.csv"    config:      extractor: mercury      default_file: "books/{{ date.year }}.bean"      prepend_postings:        - account: Assets:Bank:US:Mercury:Checking          amount:            number: "{{ amount }}"            currency: "{{ currency | default('USD', true) }}"
imports:  - name: Coffee    match:      extractor:        equals: "mercury"      desc:        prefix: "STARBUCKS"    actions:      - txn:          narration: "Coffee"          postings:            - account: Expenses:Food              amount:                number: "{{ -amount }}"                currency: "{{ currency | default('USD', true) }}"
prepend_postings on the input is the bank leg. The action adds the expense leg. Templates use Jinja. Commit the YAML from your laptop or by editing the file locally and pushing. The website file viewer is read-only.
Run import on your laptop
Section titled “Run import on your laptop”Same engine, no BeanHub account required:
pip install "beanhub-cli>=3.0.0"bh importDocs: beanhub-cli import.
Bank Connect vs upload
Section titled “Bank Connect vs upload”| Method | Who it is for |
|---|---|
| Upload CSV | Free and paid. You download from the bank yourself. |
| Connect | Paid. Plaid syncs, BeanHub writes CSVs on a schedule, then runs the same import rules. |
Both end in .beanhub/imports.yaml. Write the rules once.